Set up Price Matcher in a few minutes
No code required. Follow along — from install to your first automatic price match.
What your shoppers see
A friendly concierge right on your product page. Shoppers ask for a price match in a few taps — no forms, no leaving the page.
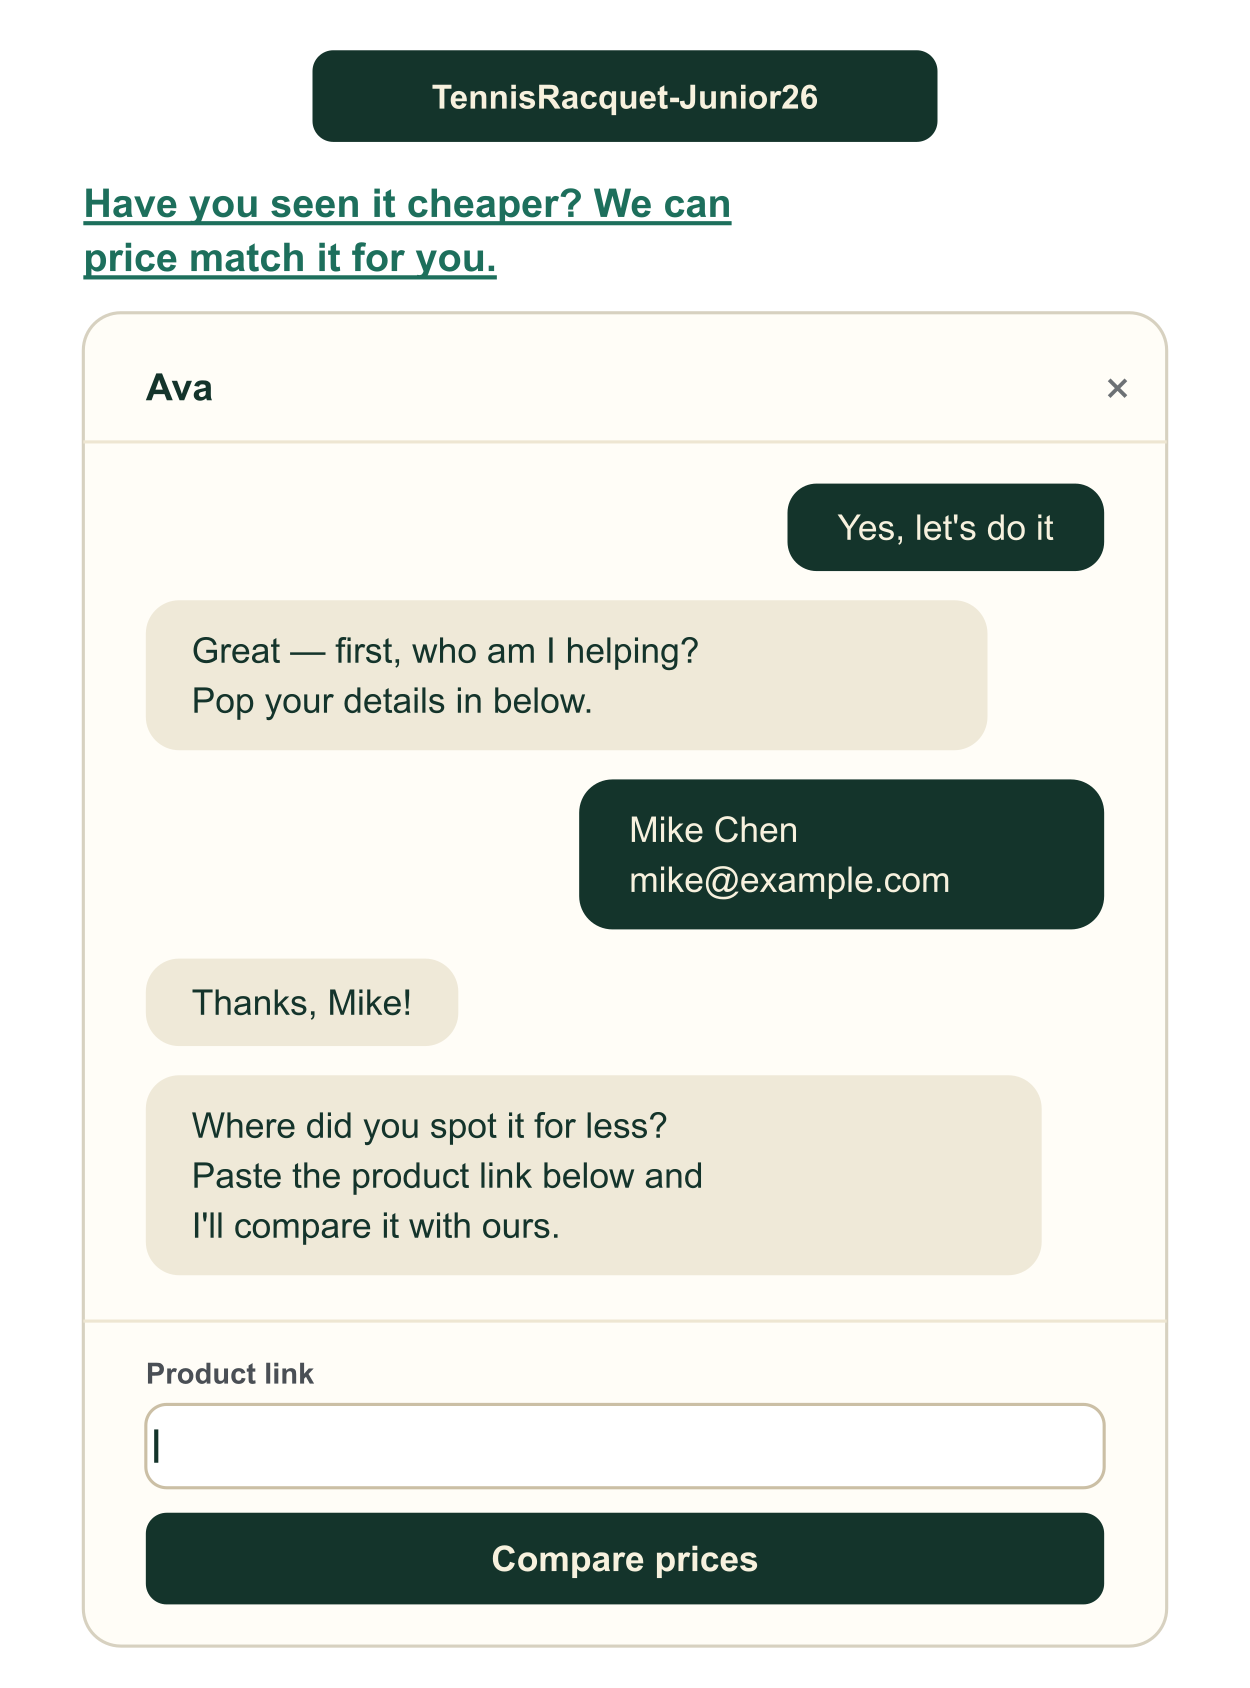
1. They chat and paste a link
The “Seen it cheaper?” launcher opens a branded chat that collects their details and the competitor link — conversational, not a form.
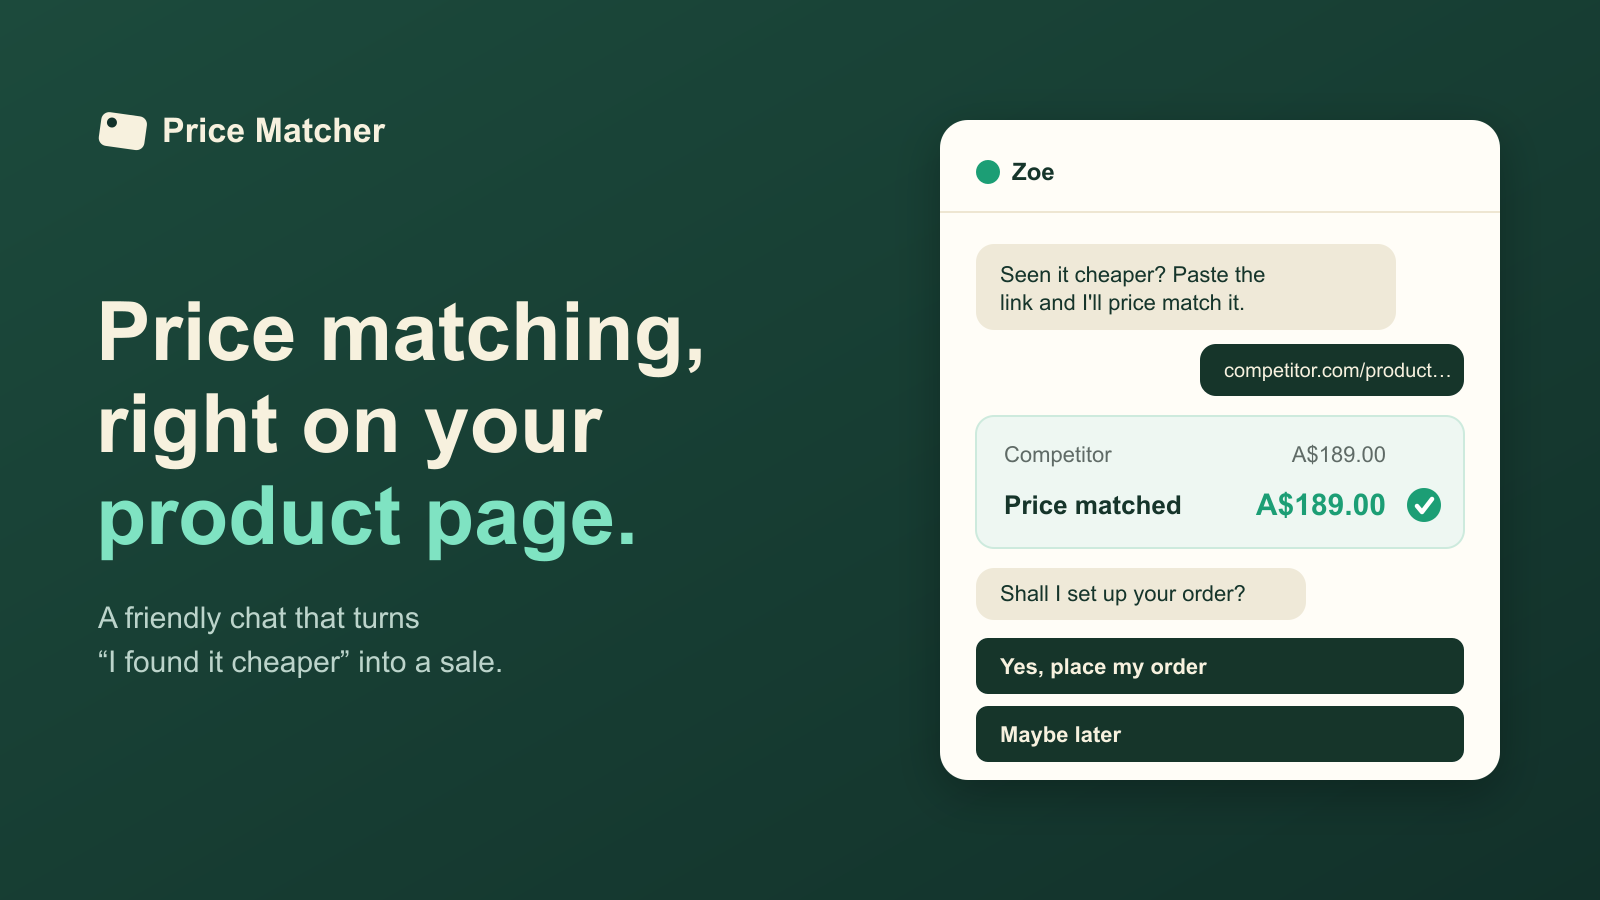
2. They get an instant offer
Price Matcher shows the competitor’s price beaten by yours, with a clear “place my order” — turning the moment of doubt into a checkout.
And here’s how you set it up
- 1
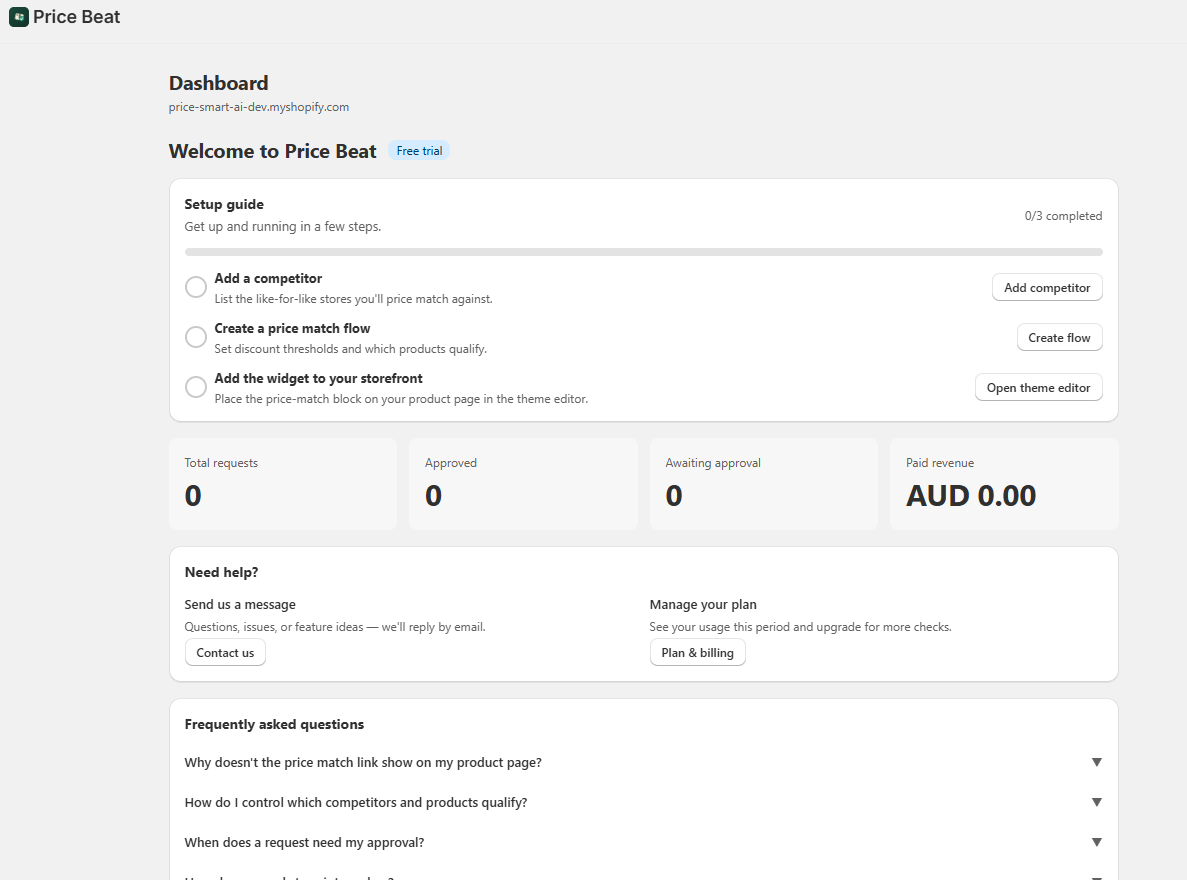
Install & meet your dashboard
Install Price Matcher from the Shopify App Store. The dashboard walks you through setup with a guided checklist, live stats, and quick links to every screen.
- 2
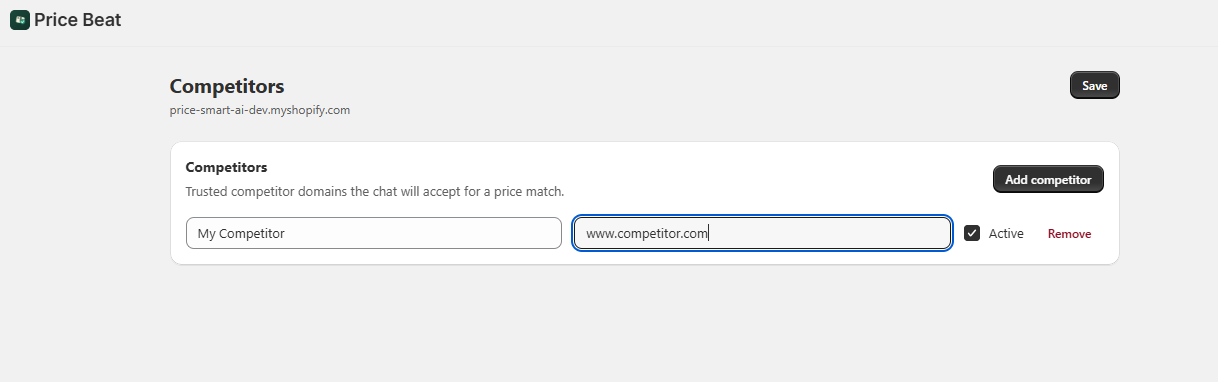
Add your competitors
List the like-for-like stores you’re happy to price match against. Only links from these approved domains are ever evaluated.
- 3
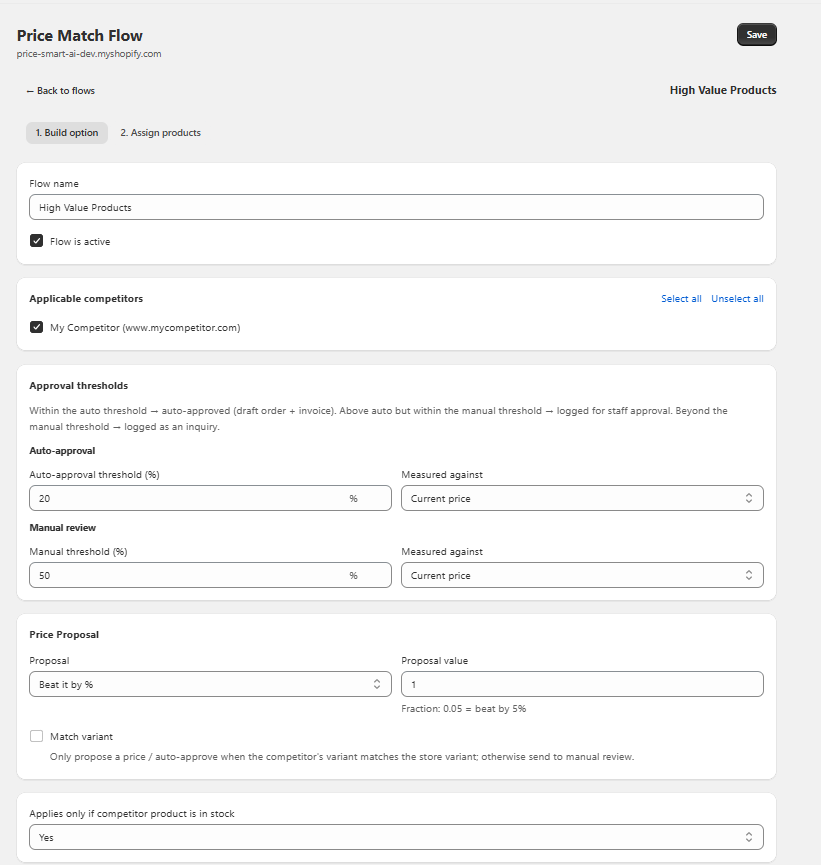
Build a price-match flow
Set your approved competitors, discount limits, and whether to match the price or beat it by a % or a fixed amount. Auto-approve, manual-review and decline thresholds keep you in control.
- 4
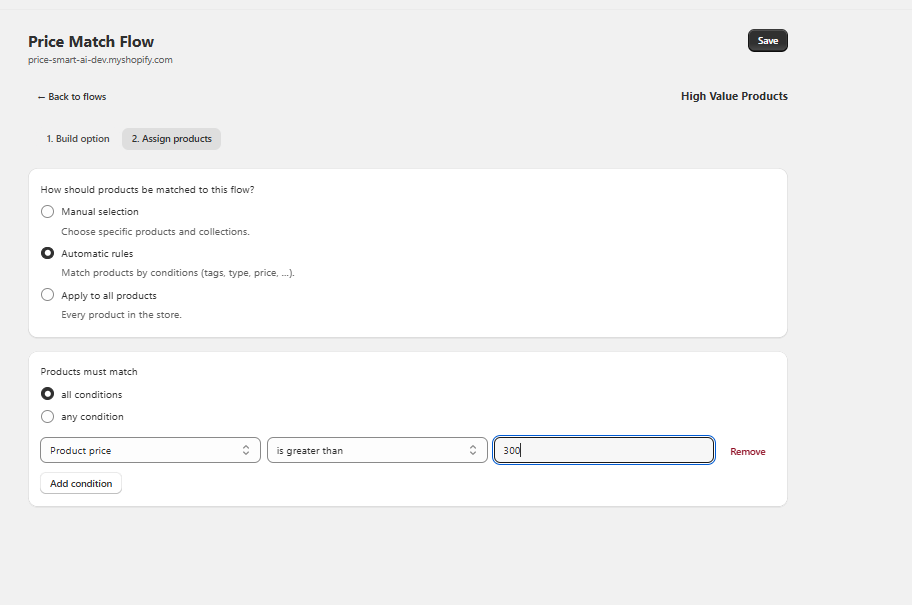
Choose which products qualify
Apply the flow to every product, to specific products and collections, or by automatic rules (type, vendor, tag, price). Different ranges can have different flows.
- 5
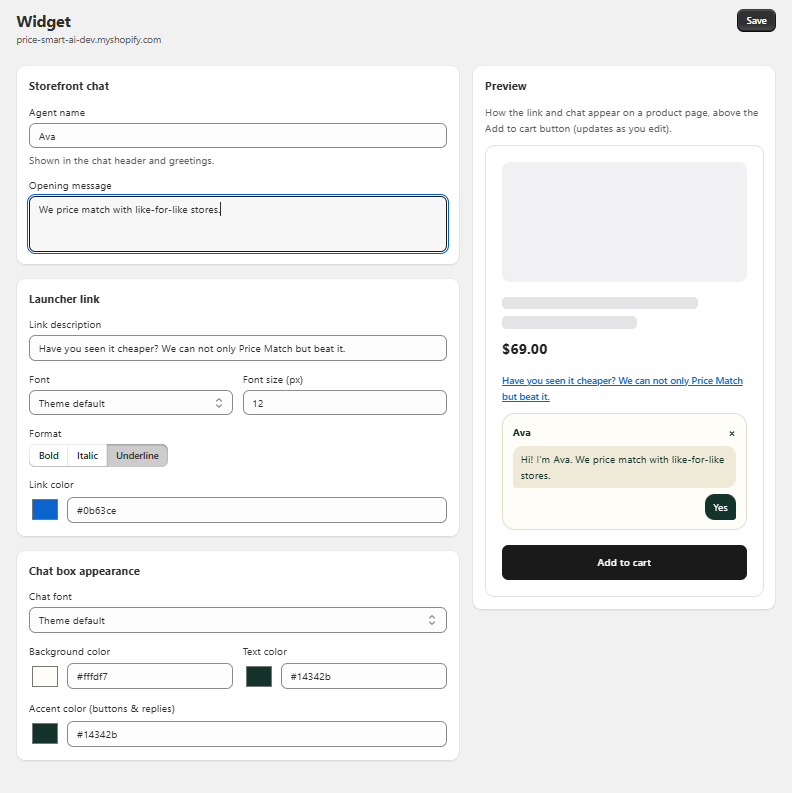
Brand the storefront widget
Name your assistant, write the opening message, and set colours and fonts — with a live preview so it matches your store perfectly.
- 6
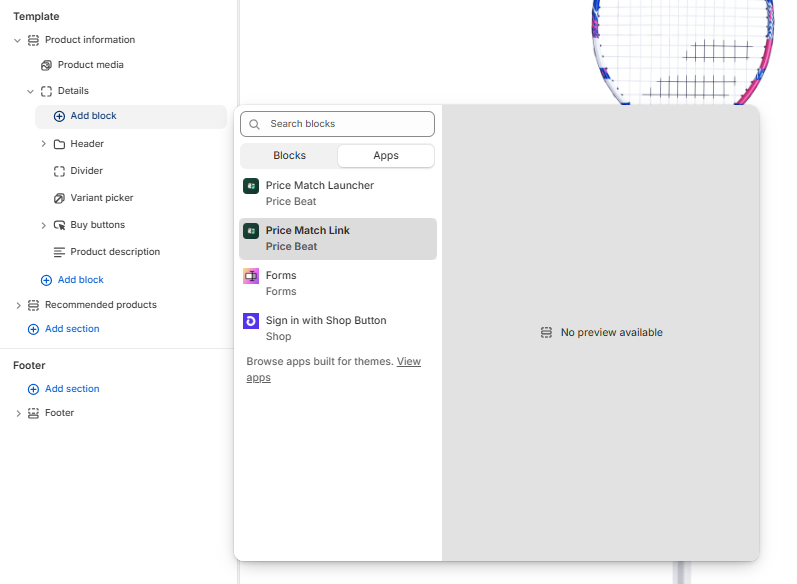
Add the widget to your theme
In the theme editor, drop the Price Matcher block onto your product template. No code — it appears as a friendly “Seen it cheaper?” launcher.
- 7
Handle approvals in seconds
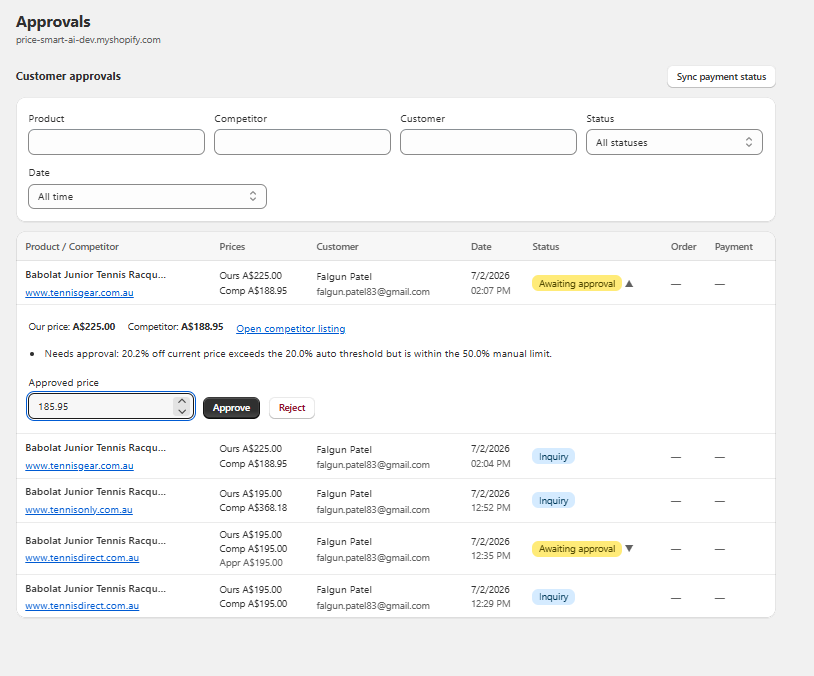
Borderline matches land in the Approvals queue. Filter by product, competitor, customer, date or status, see both prices side by side, and approve with an editable price or send a polite decline.
- 8
Set up your emails
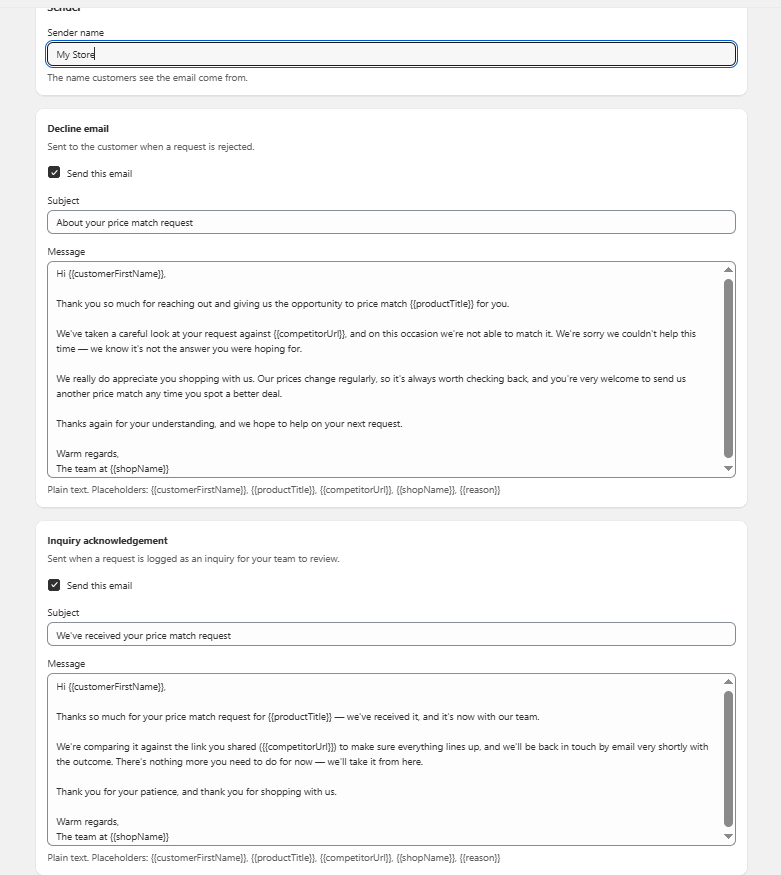
Toggle transactional emails (decline and acknowledgement) and add a custom message to the order invoice — all sent through your store.
- 9
Pick a plan that fits
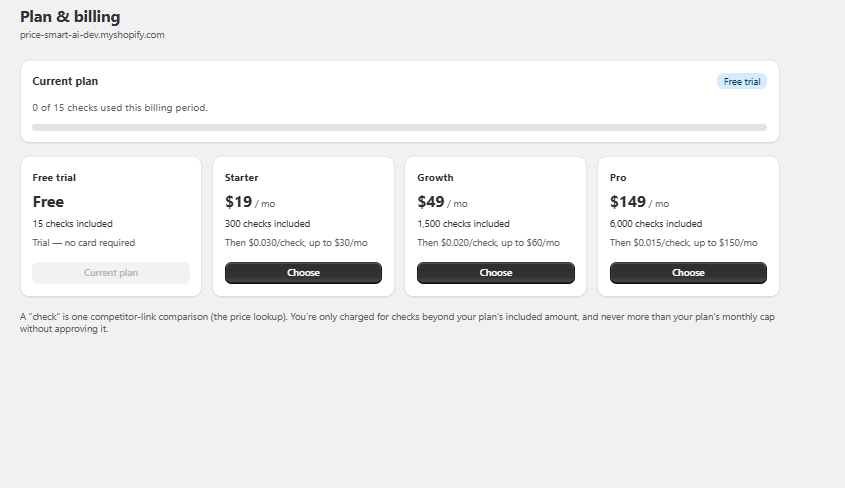
Start on the free trial, then choose a plan as you grow. Overage is capped, and you approve any charge beyond it — billing is handled securely through Shopify.
- 10
Approve from your phone
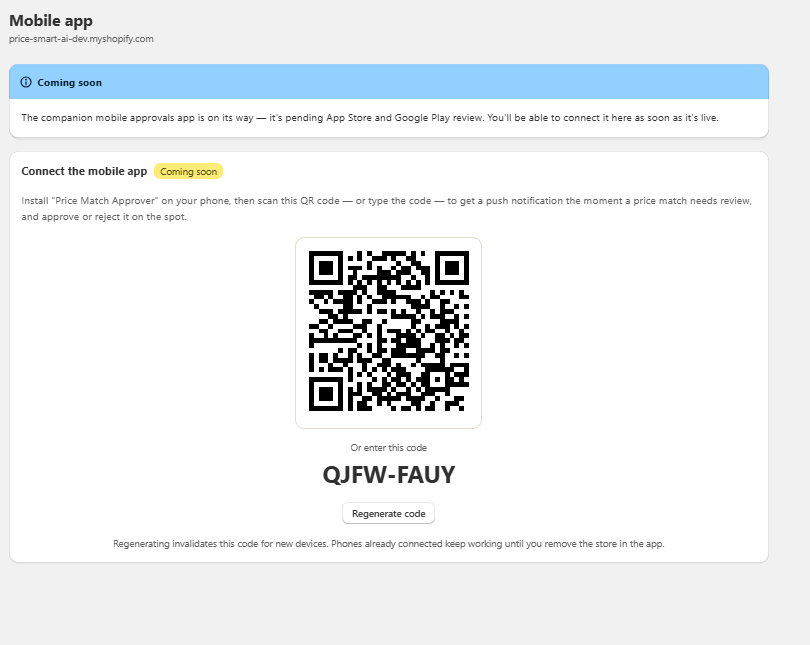
Connect the companion mobile approvals app (on the App Store and Google Play) so you can approve or decline the moment a request lands — no laptop needed.
That’s it — you’re live
Your shoppers can now request a price match, and Price Matcher handles the rest.